
Use PetroVisor to build your own visualizations in Power BI.
This article describes the requirements for connecting to Power BI and the steps to connect to data views, P# scripts, Pivot Tables and Reference Tables.
Advanced - Configuring an Automatic Refresh
Requirements
- Download and install Microsoft Power BI Desktop
- Download and install the Datagration custom Power BI Connector
- Edit Power BI Security
Download the Datagration custom Power BI Connector
Click the link below to download the latest Datagration custom Power BI Connector.
Download the Power BI Connector here.
Click this link for more information from Microsoft on how to connect to data sources using Power BI.
https://learn.microsoft.com/en-us/power-bi/connect-data/desktop-data-sources
The Datagration custom connector file (with .mez extension) should download to your browser's Downloads folder.

Tip: A best practice is to save the Datagration custom Power BI Connector to This PC > Documents > Power BI Desktop > Custom Connectors.

Edit the Power BI Security
In order for the connector to work correctly, Power BI needs to have the security feature updated to recognize the connector.
- Open the Power BI Desktop App.
- Click File.

- Click Options and Settings.
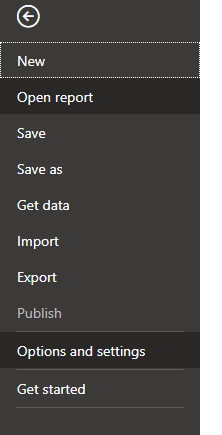
- Select Options.

- Select Security.

- Under Data Extensions>Change to (Not Recommended) Allow any extension to load without validation or warning.
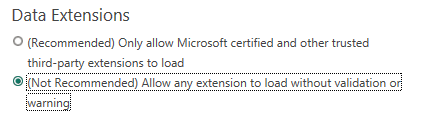
- Click OK.

There might be issues with authentication window during the first-time connection to data via Datagration Custom Connector. In that case change the settings to use your default web browser to authenticate.

- Restart Power BI.
Connect to Tables and Scripts
- Click Get Data in Power BI.

- Click More from the drop-down menu.
- Select Other.
- Locate and select the Datagration (Custom) connector. Note that if you hover over the Datagration (Custom) connector, you will see a tooltip that includes the version of the connector.
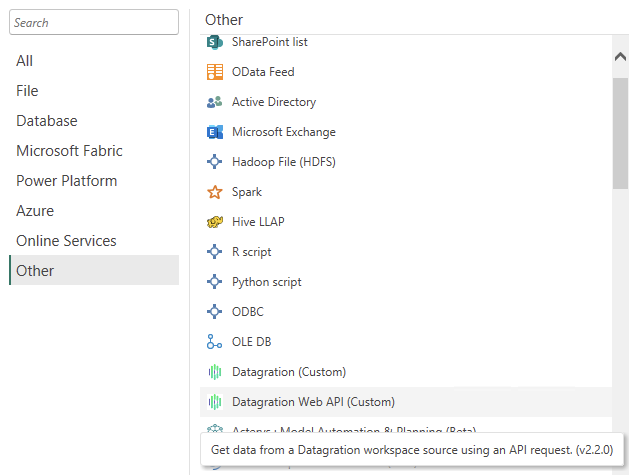
- Click Connect.

Note: The Datagration Web API (Custom) connector is for advanced users. It can be used to connect to raw data sources inside a Petrovisor workspace using API requests.
You will see a warning pop up.
- Click Continue.

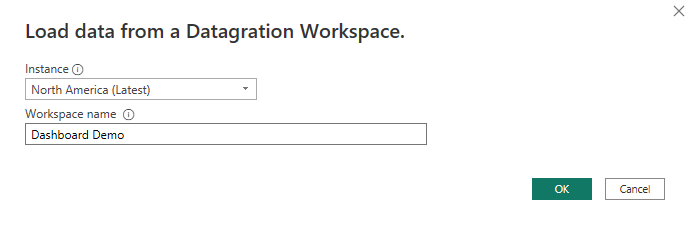
- Select the instance.

- Click OK
- Select the workspace.
Sign In to PetroVisor.
- Click Sign In.

- Click "Sign in" and enter your username and password.
- Connect.

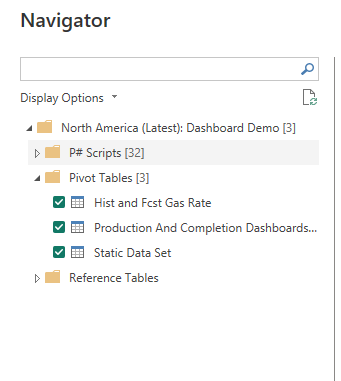
Use the Navigator to select Data Views, P# Scripts, Pivot Tables and Reference Tables to bring into Power BI.
- Select Load
- The data is now available in Power BI.
Advanced - Configuring Automatic Refresh
By default, 3rd party connectors do not refresh automatically in PowerBI. However, there is a feature called the Data Gateway that allows you to use a server for performing data refreshes.
To refresh automatically your report must be published to a PowerBI server. With 3rd party adapters (the PetroVisor Connector) you'll need to use an "On-Premise Data Gateway". This data gateway will not access anything in your network but will communicate the PetroVisor cloud or on-premise server. We recommend install this on a standalone server or virtual machine and it does not need direct access to anything other than the PetroVisor HTTP(S) ports. If this machine is not online the reports will be unable to refresh automatically.
- Install the Enterprise Gateway as detailed here.
- Add the Connector file to a folder and point the gateway connectors settings to here. Ensure that the service account the gateway uses has access to it.
- Restart the Gateway Service
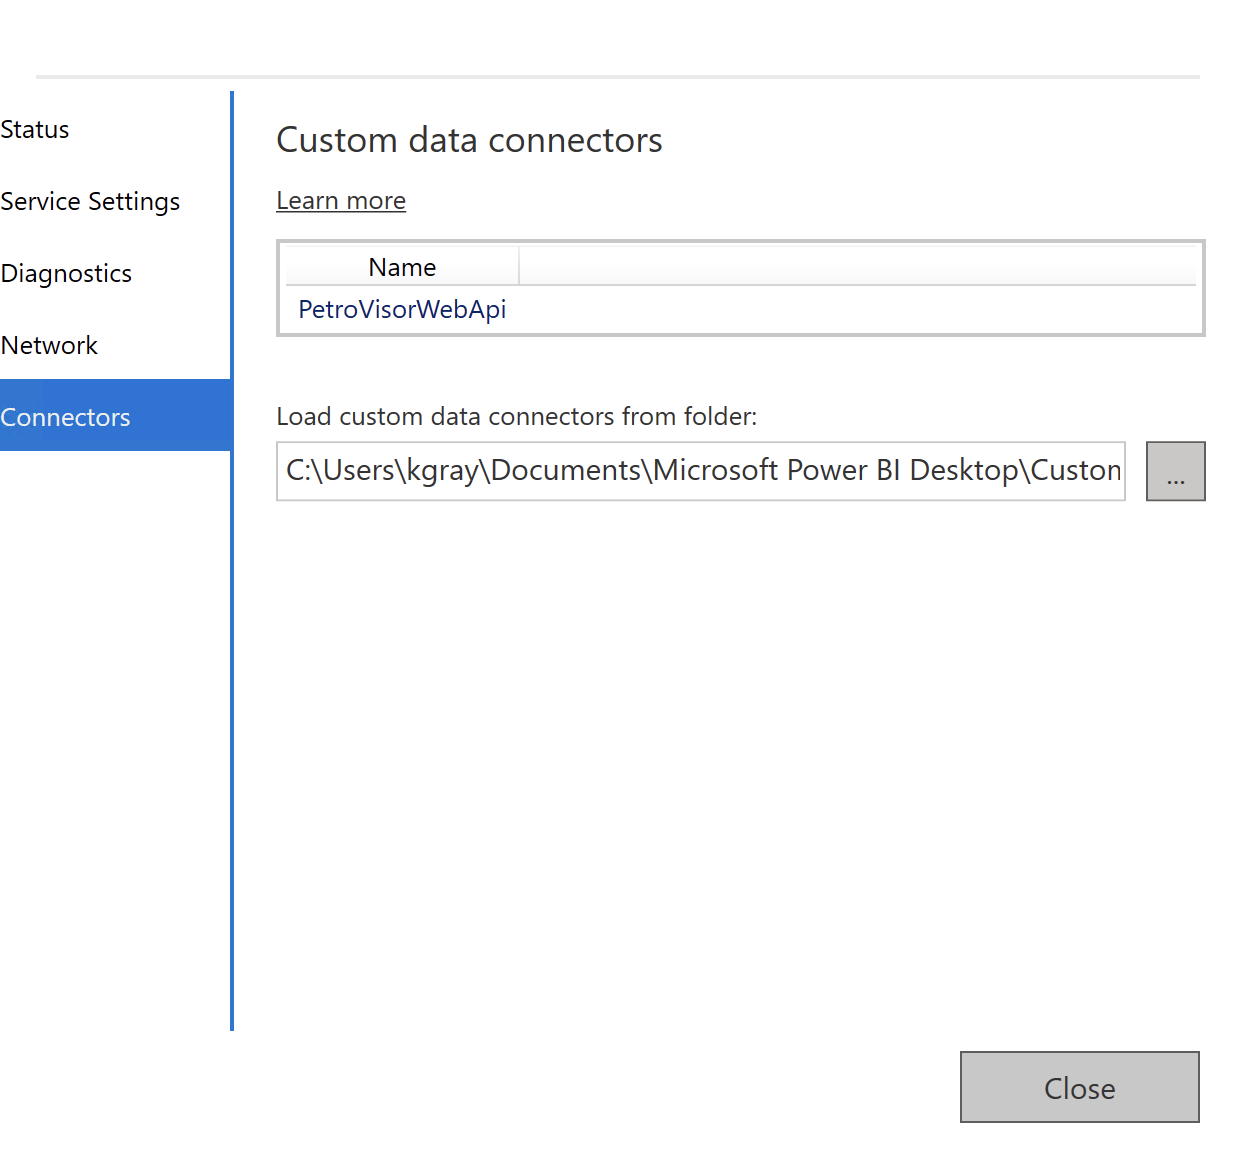
- Verify the Connectors tab shows the plugin loaded (as seen in the screenshot above).
- Modify the settings on your data source in PowerBI on the web
- Select the Data Sets Tab

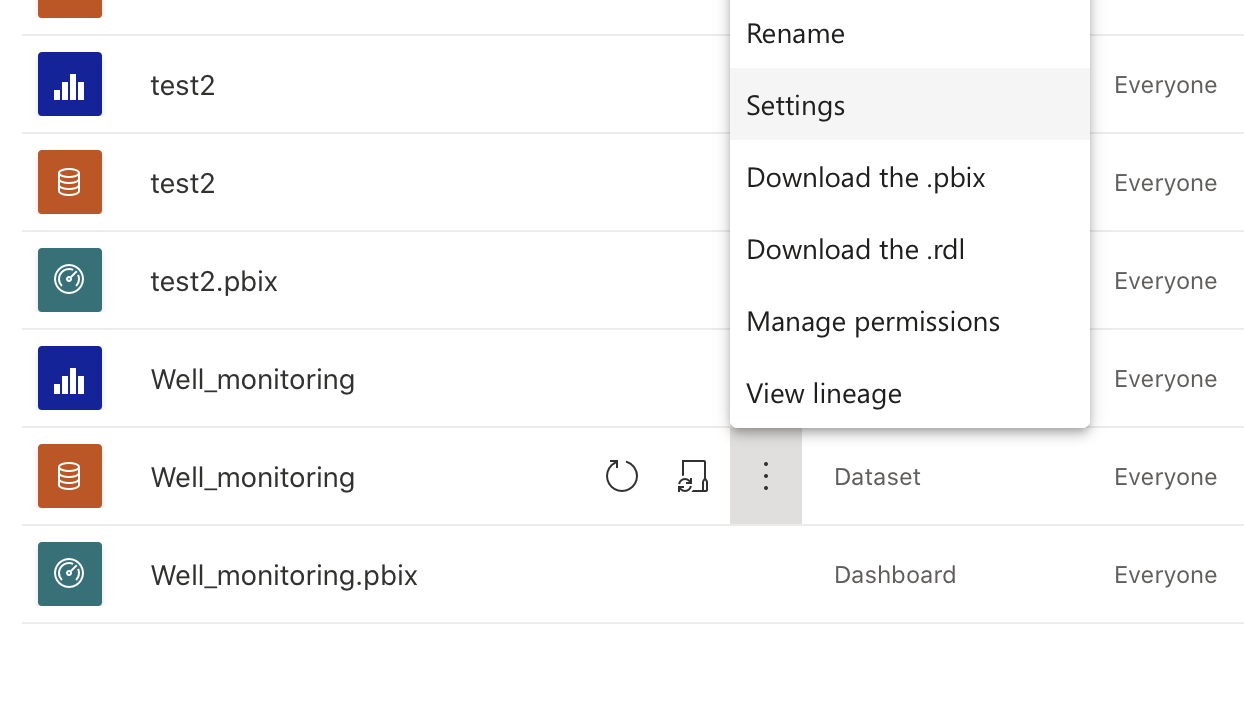
- Your Gateway should appear but say it is not configured
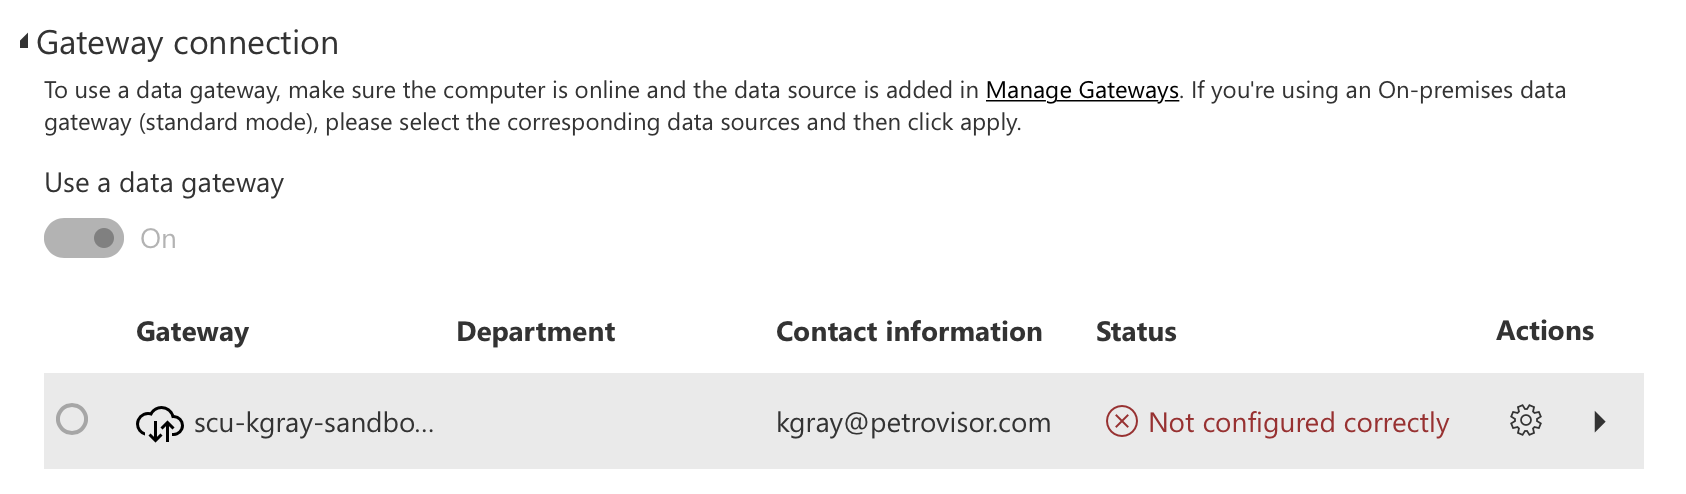
- Click the Arrow in the Actions table to expand the errors

- Select "Manually add to gateway"
- Fill in the parameters as defined in your report

- Click "Edit Credentials" and log in to petrovisor, then add your datasource
- Return to the Gateway connection, expand the gateway (>) and map your credentials and choose Apply.
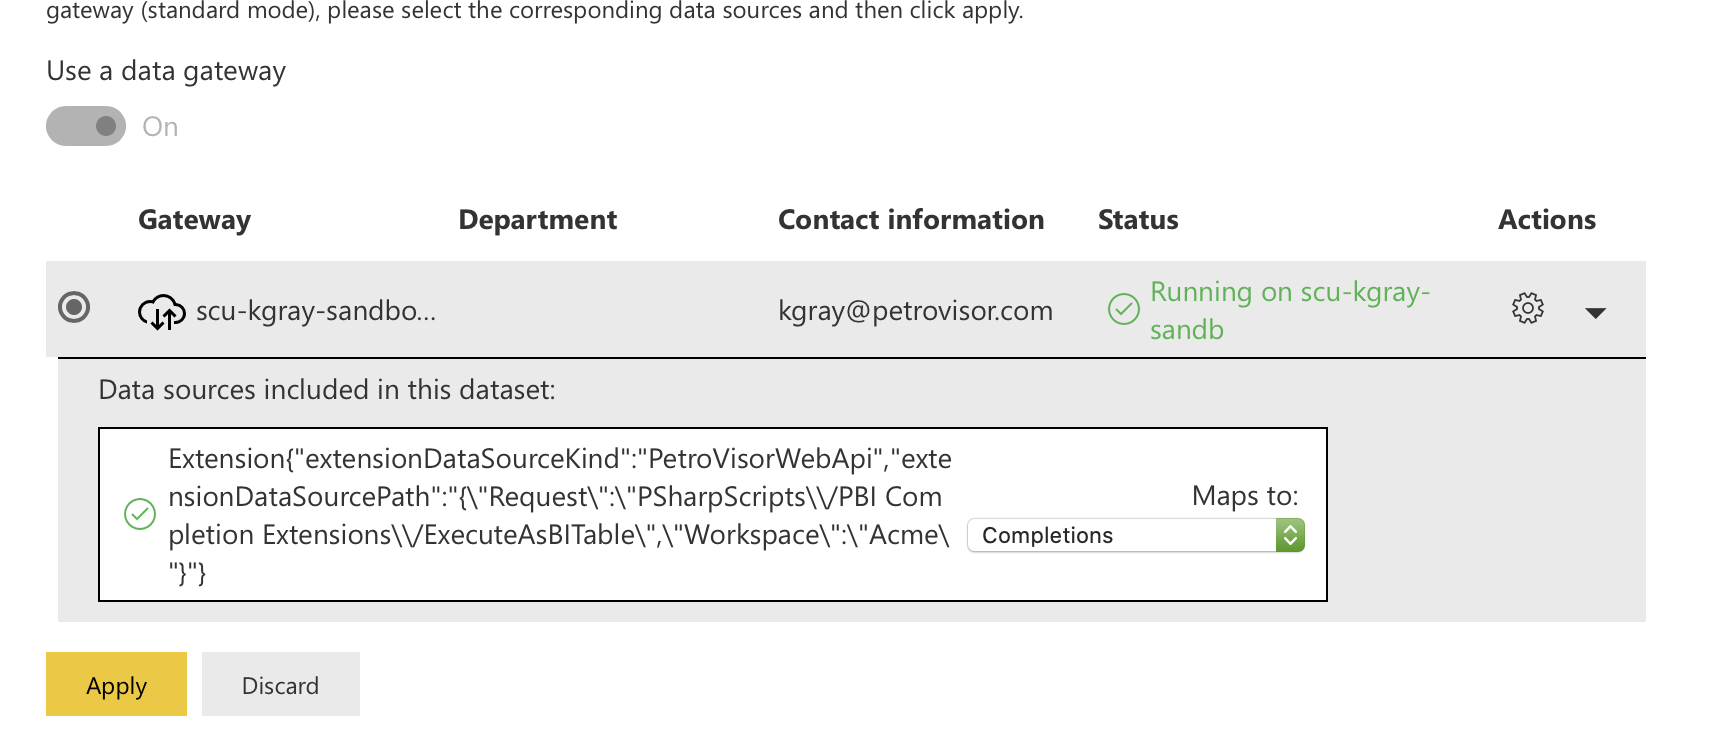
- Ensure that your Scheduled Refresh is Enabled

- You're done! Your reports should automatically refresh.
We realize this is a confusing step and are working with Microsoft to make this easier. If you need any assistance, please reach out to the PetroVisor team and we're happy to help!
Update 1/8/2024
Updated Power BI Connector: This version restores the default type of NULL columns to numeric, which is what it was prior to v2.1.2. We were having issues with existing dashboards breaking with v2.1.2 because of the wrong type for NULL columns that was used in that version. v2.1.3 fixes this by restoring the default type of numeric for NULL columns, as was used in versions prior to v2.1.2.
Update 1/17/2024
New connector version. Version 2.2.0 is a major performance enhancement using new PetroVisor API endpoints to provide column type definitions to Power Query, even for empty columns. By doing it this way, we no longer do costly, time-consuming scans of the data within Power Query to infer the column types. It is especially important if you have tables or scripts with millions of rows of data.
Retired Connectors.