
This article includes:
Running a workflow with a Scenario
Running a P# Script with a Scenario
Scenario Creation
There are two types of Scenarios:
- Empty Scenario: A template for storing Workspace, Numeric Static, and Text Static values for a user-defined entity set.
- Scenario Planner: A template for creating a schedule vs time of wells to be drilled.
In the platform, navigate to Scenarios.
Select 'Add Scenario'
Empty Scenario choice: Select 'Empty Scenario'

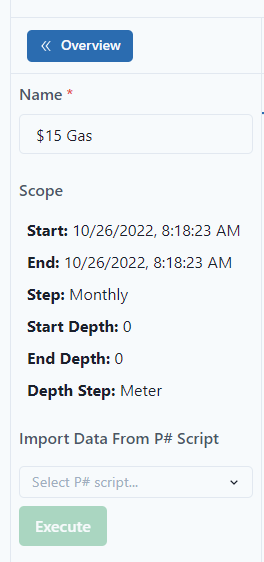
Add Name for the Scenario.
Best practice when naming a Scenario is to give it a descriptive name that informs users on the use of the Scenario.
Once the Scenario has a name, it can be saved; however, it is a better practice to import an entity set and a scope. For instance, in the below example, it starts and ends on the same date and time, has a Monthly step, and 0 depth.
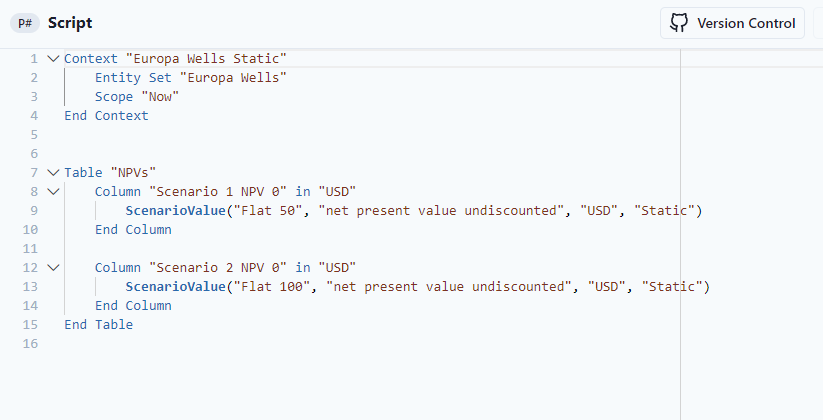
To change the entity set and scope, data needs to be pulled from a P# Script. The P# Script below was specifically written for economic scenarios. The script contains tables of both static and dynamic signals.

For additional scripting assistance, see the knowledge base articles for P#.
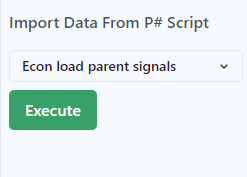
In the Scenario window, load the P# Script.
Execute the script.
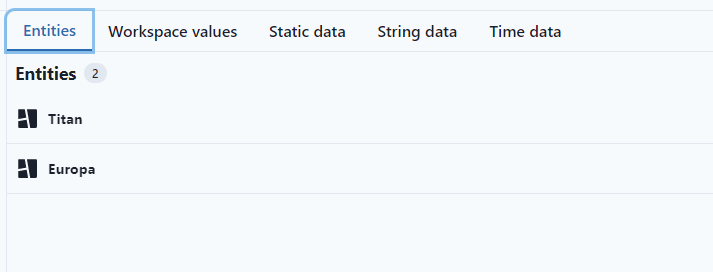
Notice it will load the scope and entities from the P# Script.
In order to load the tables, select Save.
Then select the script again and Execute. On this second (2nd) execute, the tables from the Script will populate.

Save.
Scenario Planner choice: Select 'Scenario Planner'
Use Scenario in Workflow
To use the Scenario, it must be run in a workflow. To add to a workflow, navigate to Workflows.
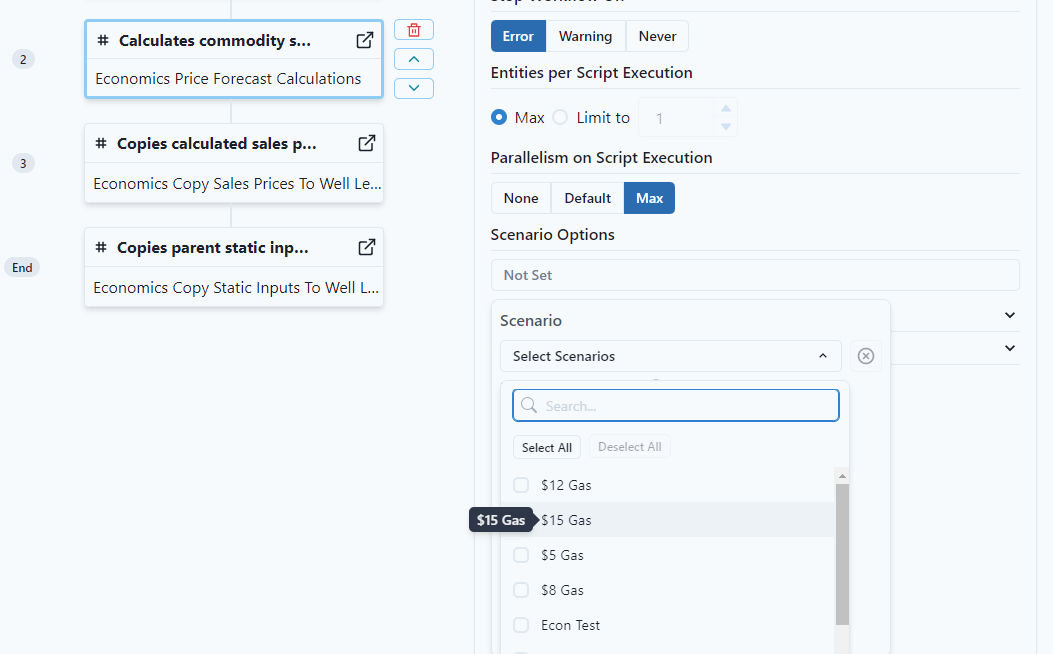
Select the workflow to run the scenario. In the example, Economics Price Forecast is selected.
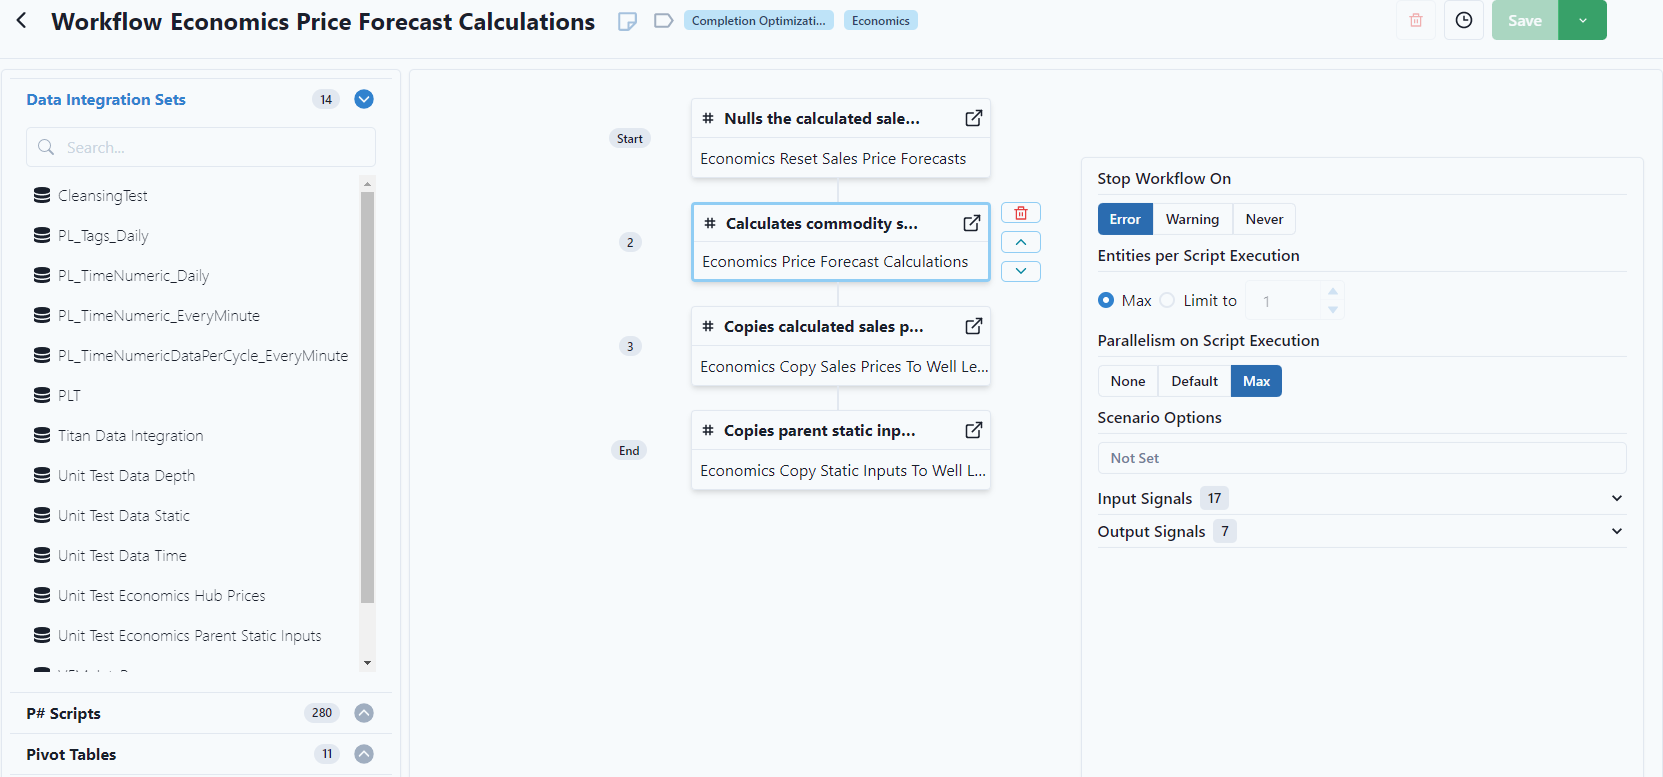
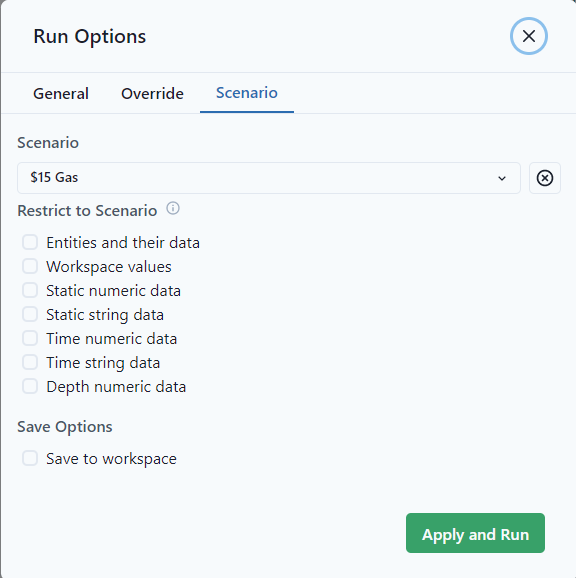
This workflow would normally run with the signals from the workspace. To run using the Scenario, select the Scenario Options on the right of the selected box.
Use the drop down to select the Scenario to run. In the example, it's $15 Gas.
The scenario can also have a data set added directly from a data set integration. Every time the workflow is run, the scenario data will be updated.
- Add the Data Integration to the workflow.
- Select the integration.
- Select the Scenario from the drop-down menu.

Restrict to Scenario
The Restrict to Scenario will only pull data from the scenario. This means if there is not a signal in the script, then it will not use the value from the workspace and use Null. If it is not selected, it will pull the signal from the workspace if it is not in the Scenario.
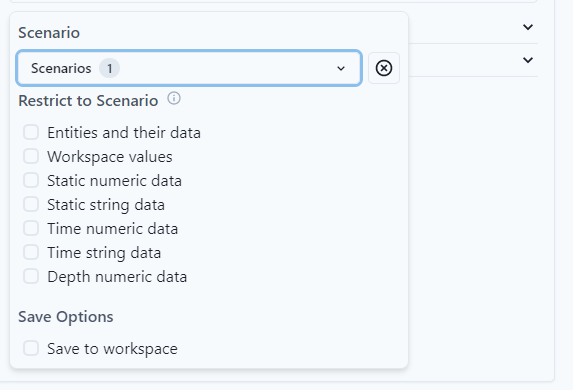
Save Options
When running the script, there are Saving statements in the P# Script. Anytime there is a Saving statement, it will save to the Scenario.

In the Scenario, if there is no column, it will add the column. If the Scenario did not have the column "Commodity Sales Price - Gas," it would add the column.
Save to the workspace would allow values from a scenario to be used in a calculation, and then have that result saved to the workspace instead of the Scenario. An example would be in you have multiped scenarios saved, but only want to display the results of one on a dashboard.
For longer workflows, the best practice would be to save the last script (the results) to the scenario. To save every script in a workflow to the scenario would increase the size and make it complex to use.
Run the Script
For specific script, they can be run using scenario in the Develop section. Select the script and use the drop-down menu under Run.
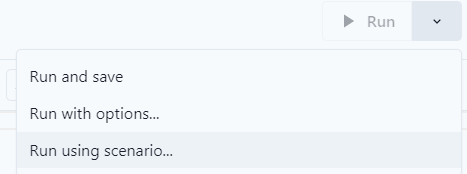
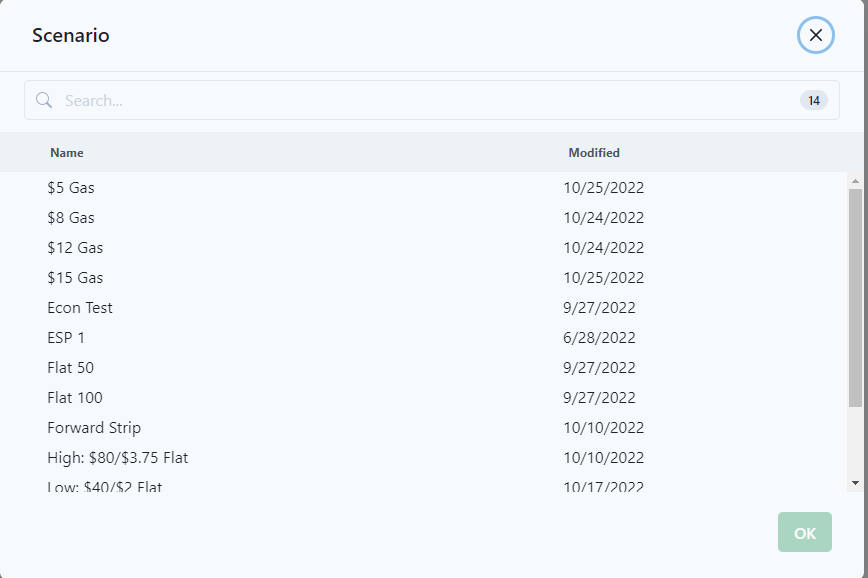
Select the Scenario. In the example, it is $15 Gas.
Notice, if Run with Options is selected, the scenario can also be run with the restrict and save options.
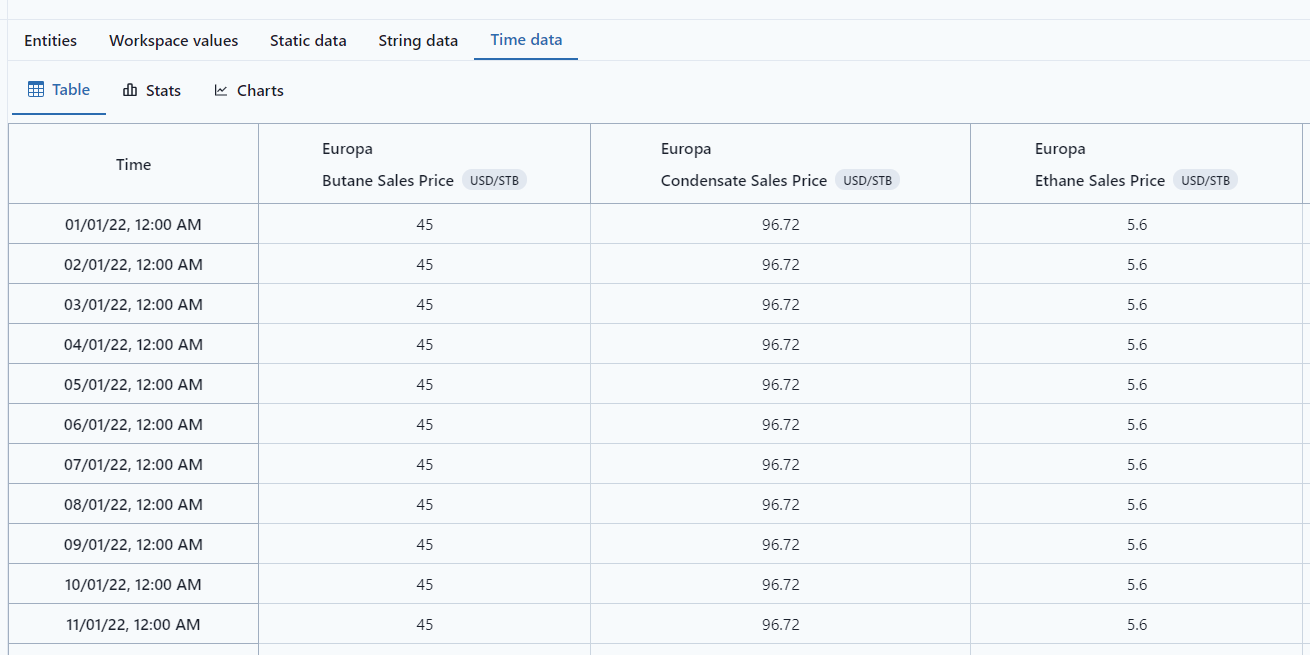
After running, go back to the Scenario to see the columns. In the example, the sales prices have been added.
Compare Scenarios
The easiest way to compare Scenarios is to use a P# Script. Below is an example for comparing NVP from different examples